Last Updated: November 12, 2026
Quick Summary
To protect plants during roof washing, first walk the property and map every plant near the roofline, runoff path, or spray zone. Then pre-wet the plants with clean water, cover those at risk with breathable fabric, and rinse them thoroughly afterward. Roof washing is one of the most common causes of chemical damage to nearby landscaping.
- Sodium hypochlorite in most roof-cleaning solutions can cause leaf burn, yellowing, and dieback.
- Walk the perimeter first and map sensitive, newly planted, and edible plants.
- Pre-wet plants before the solution goes on so leaves and soil absorb less chemical.
- Rinse plants within 10 to 15 minutes of finishing the roof wash, working top to bottom.
- Check plants again over several days, since chemical damage often appears later.
Table of Contents
- Why Roof Washing Puts Your Plants at Risk
- Step 1: Walk the Property and Map Vulnerable Plants
- How to Protect Plants During Soft Washing
- How to Rinse Plants After Roof Washing
- How to Protect Plants During Roof Washing DIY
- Roof Cleaning Plant Protection: Managing Runoff and Overspray
- Checking Plants After the Wash and When to Call a Pro
- Book a Roof Wash Where Plant Protection Is Built In
- Frequently Asked Questions
Why Roof Washing Puts Your Plants at Risk
Roof washing can quietly damage the plants around your home, so it helps to protect plants during roof washing before the job starts.
The main threat is sodium hypochlorite, the active ingredient in most roof-cleaning solutions and a close cousin of household bleach.
Runoff is the other problem. Solution flows down the roof, into gutters, and onto the ground below.
Common risk areas:
- Shrubs and bushes under the roofline
- Vegetable gardens near the house
- Newly planted landscaping
Step 1: Walk the Property and Map Vulnerable Plants
Before you start, walk the entire perimeter of the house. Note every plant that sits within reach of the roofline, the runoff path, or the spray zone.
A simple map helps. Sketch the house, then mark each plant bed and its distance from the walls.
What to check:
- Plants directly below the eaves and gutters
- Plants downhill from the roof, where runoff collects
- Overhanging branches that could carry solution
This map becomes your protection plan. You will know exactly where to pre-wet, where to cover, and where to watch for runoff.
How to Protect Plants During Soft Washing
Soft washing uses low pressure and a cleaning solution, so it is gentler than high-pressure cleaning. That does not mean plants are safe on their own. The solution still reaches them, so you need to protect them directly.
Soft washing is a common method for roof cleaning, and it works well when the plants are planned for. To protect plants during roof washing, follow three steps: wetting the plants first, covering the ones at risk, and rinsing them afterward.
Pre-Wetting and Rinsing Before Any Solution Goes On
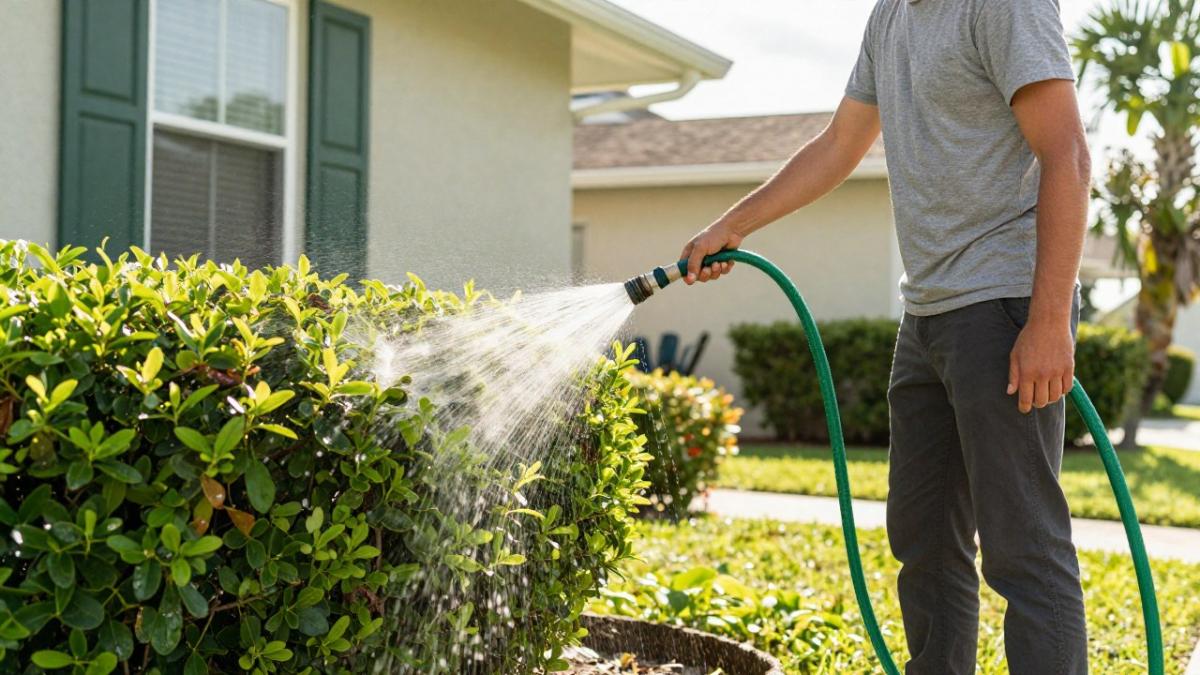
Wet the plants before the solution ever touches the roof. Dry leaves soak up chemicals faster, so a good soak with clean water gives the plant a buffer.
Follow this order:
- Water the plants thoroughly with a garden hose, from the base up.
- Soak the leaves, stems, and soil around each plant.
- Keep the water on until the plants are fully wet.
- Repeat the soak right before the solution goes on.
Pre-wetting also helps with runoff. Wet soil absorbs more liquid, so less solution reaches the roots.
Covers and Barriers Without Trapping Heat
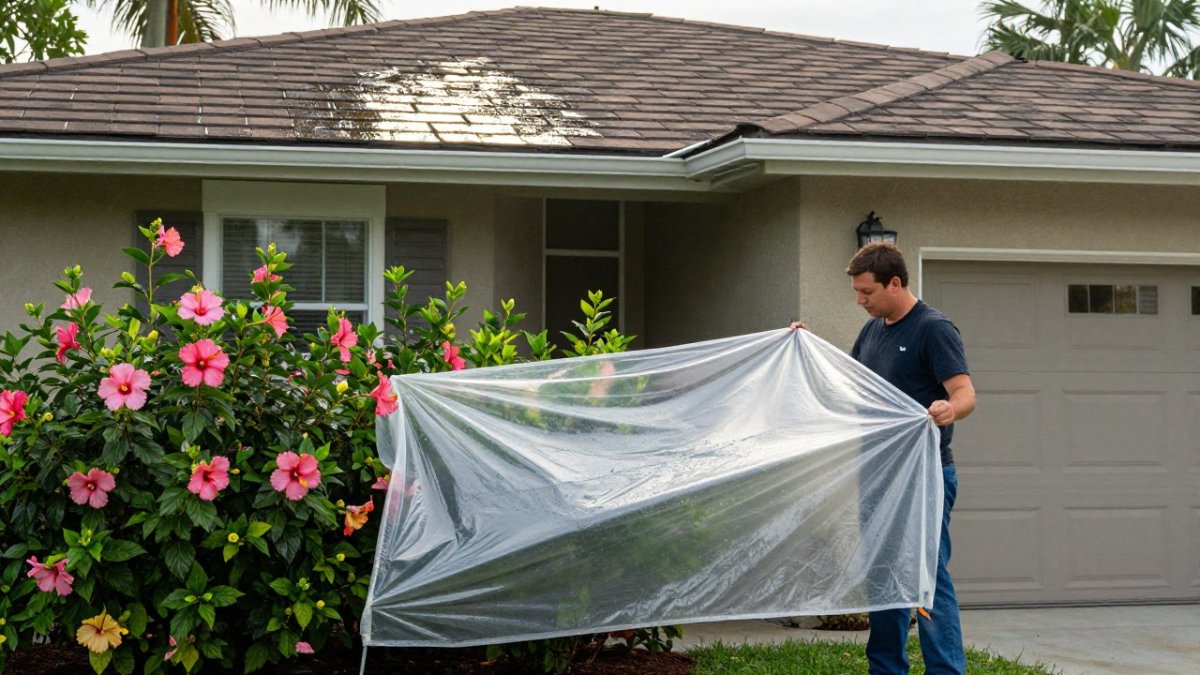
Covers protect plants from overspray, but the wrong cover can cause its own damage. A cover that traps heat can cook leaves on a sunny day.
Choose covers carefully:
- Use breathable fabric or landscape cloth rather than plastic sheeting directly on foliage.
- Keep the cover loose so air can move underneath.
- Remove covers as soon as the wash is done.
Plastic sheeting works as a barrier for the ground, not the plant itself. Lay it over soil and mulch to catch drips, and keep it away from the leaves.
How to Rinse Plants After Roof Washing
Rinsing right after the wash is one of the most important steps. It washes leftover solution off the leaves before it can burn them.
Use a garden hose with a gentle spray, and work from the top of each plant down.
A simple rinse routine:
- Start rinsing within 10 to 15 minutes of finishing the roof wash.
- Rinse each plant for a few minutes, not just a quick spray.
- Pay extra attention to plants closest to the roofline.
Do not skip the rinse because the plants look fine. Chemical damage often shows up a day or two later, so a thorough rinse now prevents trouble later.
How to Protect Plants During Roof Washing DIY
If you plan to wash the roof yourself, the same principles apply. DIY washes often skip the protection steps, which is where most plant damage happens.
Plan the whole job before you start, because protecting plants during roof washing depends on preparation:
- Gather your hose, covers, stakes, and a bucket of clean water.
- Pre-wet all vulnerable plants before you mix the solution.
- Set up covers for plants near the wash zone.
Mix the solution carefully and follow the label directions. Stronger is not better, and a stronger mix raises the risk of plant damage. Work from the bottom of the roof upward so runoff moves away from the plants you have already protected.
Common DIY mistakes:
- Washing on a windy day, which spreads overspray.
- Skipping the pre-wet because it takes extra time.
- Leaving solution on the plants after the wash.
Roof Cleaning Plant Protection: Managing Runoff and Overspray
Runoff and overspray are the two ways cleaning solution reaches your plants. Runoff is predictable because it follows the roof pitch and gutter path; overspray is messier because wind and spray angle decide where mist lands. Treat them as separate problems with separate controls.
Runoff: Homes With Gutters
Gutters carry most of the solution away from the roofline, but only if the downspouts discharge somewhere safe. Walk the downspout path before the wash and confirm the outlet is at least several feet from plant beds, edibles, and low spots where water pools.
Some crews disconnect downspouts at the elbow and route the discharge into a temporary trough or hose that leads to a drain, driveway, or lawn area away from landscaping. Reconnect everything after the final rinse.
Runoff: Homes Without Gutters
Without gutters, solution sheets down the wall and pools at the foundation, right where shrubs and beds sit. This is the scenario most guides skip, and it is where damage is most likely.
Practical options, from simplest to most involved:
- Plastic sheeting apron: Lay a strip of heavy plastic along the wall base, sloping it away from the beds and toward a lawn or hard surface. Weight the edges so it stays put.
- Sandbag or foam barrier: Create a low berm at the drip line to divert flow along the wall rather than into soil.
- Temporary gutter: Clamp a length of vinyl gutter or a gutter bag under the eave to catch the heaviest flow and route it to a bucket or hose.
Keep any barrier in place until the final rinse is complete, then remove it and rinse the pavement or lawn where flow was diverted. Do not leave plastic sheeting over soil for days; it traps moisture and heat and can damage roots and turf.
Neutralizers: What They Can and Cannot Do
Gypsum is the neutralizer most often mentioned for sodium hypochlorite exposure. It can help bind residual sodium in soil, but it is not a rescue treatment for leaves already burned, and it does not replace rinsing.
Watch out: Applying a neutralizer before rinsing can push residue deeper into soil or foliage rather than removing it. Rinse first, then treat soil if needed.
Overspray: Controlling the Mist
Overspray travels with wind and spray angle. Wash on a calm day, keep the spray pattern low and directed, and avoid fanning the nozzle toward beds. Cover plants in the spray path with breathable fabric, and rinse any plant that gets misted as soon as you notice it. If wind picks up mid-job, pause and re-wet the plants before continuing.
Runoff and overspray checklist:
- Downspouts discharge away from beds, edibles, and low spots.
- Barrier or diversion in place for homes without gutters.
- Covers on plants in the spray path.
Checking Plants After the Wash and When to Call a Pro
Aftercare is where prevention gets tested. Sodium hypochlorite damage often appears a day or two after exposure, and sometimes longer on slow-growing shrubs, so a single next-day glance is not enough. Build a short inspection schedule and know what to do at each check.
Timed Inspection Schedule
- Immediately after the final rinse: Walk the perimeter and look for visible residue, pooled solution, or covers that shifted. Re-rinse any plant that still looks wet with solution, and remove covers so foliage can dry.
- Same evening: Check the plants closest to the roofline and any plant that got misted. Look for slick leaves, white residue, or wilting that was not there before the wash.
- 24 hours: Inspect leaves on both sides for yellowing, brown spots, curling edges, or drop. Check soil at the base for lingering odor or residue.
Plant-Specific Recovery
- Edible gardens: Do not harvest until foliage has been rinsed and the plant shows no residue. If solution reached soil, water deeply to dilute, and follow label guidance before eating anything from affected beds. When in doubt, discard affected crops rather than risk exposure.
- Sensitive species: Thin-leaved plants, ferns, and newly installed landscaping are most vulnerable. Rinse more often and keep them out of direct sun during recovery if they are wilting.
- Shrubs and bushes: Rinse the canopy from top down, then soak the soil at the drip line. Avoid fertilizing until new growth appears; fertilizer can push stressed roots too hard.
Recovery Steps That Help
Rinse again with clean water if you see any sign of stress, and water deeply rather than frequently. Skip fertilizer and pruning until the plant shows new growth.
Watch out: Overwatering a stressed plant to ‘flush’ it can drown roots, especially in heavy soil. Water deeply, let the surface dry between sessions, and focus on rinsing foliage rather than saturating soil.
When to Call a Pro
Call a professional or a horticultural extension service if:
- Widespread leaf burn or dieback appears across multiple plants.
- Runoff reached a vegetable garden or edible plants and you are unsure what was applied.
- You do not know how the solution was mixed or at what strength.
Before hiring anyone, ask what their guarantee covers. A pressure washing guarantee should spell out what is included, what is not, and how the work affects your roof warranty. Freedom Wash Club’s pressure washing guarantee details explain what is covered, and avoiding property damage during a pressure wash covers safe pressure and soft washing practices.
Book a Roof Wash Where Plant Protection Is Built In
Plant protection takes time, planning, and the right equipment. If you would rather leave it to a crew that handles it every day, Freedom Wash Club is a locally owned and operated South Florida company with over a decade of experience in pressure cleaning and paver sealing for residential and commercial properties.
If you want to start now, you can book driveway cleaning without an estimate or check that a provider is insured for pressure washing in Florida. Freedom Wash Club also stands behind its work with a professional pressure washing satisfaction guarantee.
Ask for your free quote today.
RECEIVE YOUR FREE QUOTE
Frequently Asked Questions
How do you protect plants during roof washing?
Start by pre-wetting plants and the soil around them with clean water before any cleaning solution touches the area. Cover delicate shrubs with breathable fabric or a plastic sheet that does not touch the foliage, and secure it so it does not trap heat. After the wash, rinse the plants thoroughly with clean water to dilute any residue. Keeping the wash off foliage in the first place is far easier than trying to correct chemical damage afterward, so plan the protection before the crew arrives.
Can roof-washing solution damage grass, shrubs, or garden plants?
Yes. Cleaning solutions that contain sodium hypochlorite, which is the active ingredient in bleach, can burn leaves, discolor grass, and stress shrubs if they are left on the plant. Damage is most likely when overspray lands on foliage or when runoff pools around roots. Pre-wetting and a thorough post-wash rinse reduce the risk considerably, but they do not eliminate it, so inspect plants after the job and keep a record of anything that looks stressed.
What should I tell a roof-cleaning company about my landscaping?
Point out every vulnerable plant, including edible gardens, newly planted landscaping, and shrubs under the roofline. Mention any plants you want covered or rinsed, and show the crew where runoff is likely to collect. Ask how they plan to pre-wet, rinse and manage runoff, and whether they use a neutralizer and how they apply it. A clear conversation before the job lets the crew plan the protection rather than react to damage.
What should I do if plants look stressed after roof washing?
Rinse the affected plants again with clean water as soon as possible to remove any remaining residue, and avoid fertilizing or pruning until the plants recover. Watch the foliage over the following days for browning, wilting or leaf drop. If the damage spreads or does not improve, contact a local landscaping professional or the roof-cleaning company to discuss next steps.