Last Updated: October 24, 2026
Quick Summary
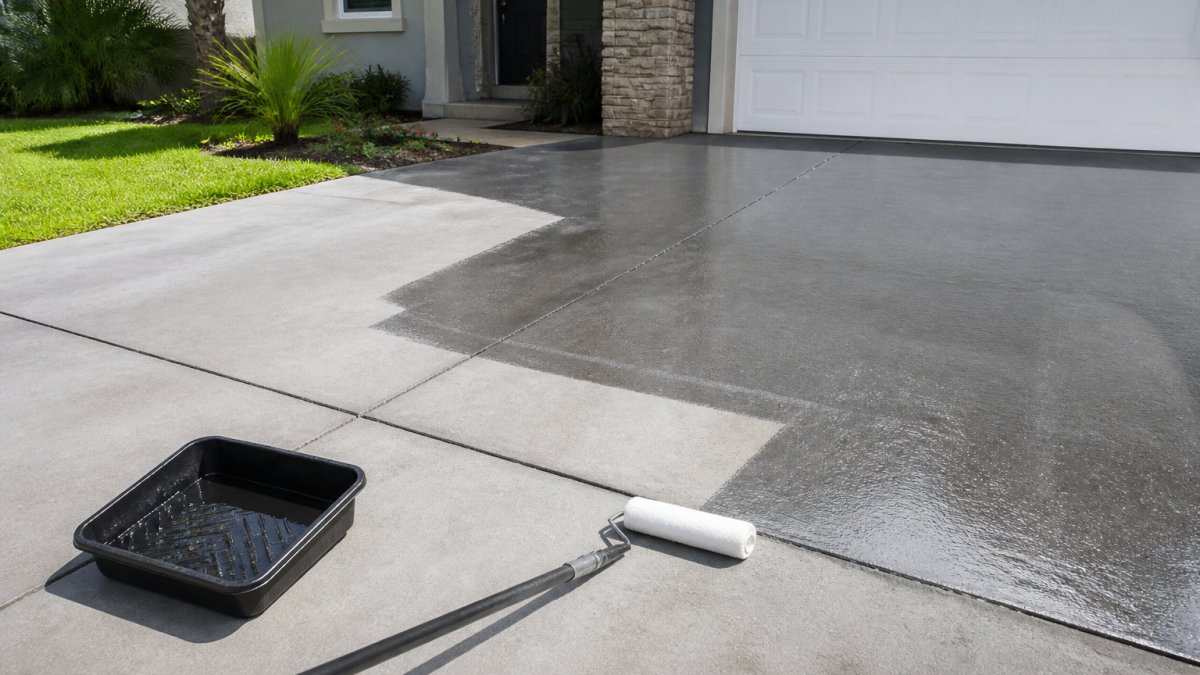
To seal concrete driveway surfaces protects your investment by blocking water, salt, and chemicals that cause cracks and deterioration. Clean the surface thoroughly, let it dry completely, and apply the sealer in thin, even coats for long-lasting protection.
- Clean the driveway with a stiff broom, degreaser, and pressure washer to remove dirt, oil stains, and grime before sealing.
- Use the plastic-sheeting test: tape clear plastic to the concrete for 24 hours; no condensation means it’s ready to seal.
- Apply sealer in thin, overlapping coats working systematically from one end to the other to avoid pooling and peeling.
- Wait 24 to 48 hours for full curing before driving on the driveway, depending on sealer type and weather conditions.
- Reapply sealer every 1 to 5 years depending on the product type, water-based lasts 1 to 3 years, solvent-based lasts 3 to 5 years.
Table of Contents
- Why Seal Your Concrete Driveway
- How to Clean a Concrete Driveway Before Sealing
- Allow Your Concrete to Dry Completely
- Best Concrete Driveway Sealer Options
- Sealing an Old Concrete Driveway
- Apply Your Sealer in Even Coats
- How Long Does Concrete Sealer Take to Dry
- Common Mistakes to Avoid When Sealing
- Frequently Asked Questions
Why Seal Your Concrete Driveway
To seal concrete driveway surfaces protects your investment. Concrete is porous, so water, salt, and chemicals seep in and cause cracks, stains, and deterioration over time.
Sealed driveways hold up better against the elements, helping homeowners avoid costly repairs while boosting curb appeal and resale value.
The process is straightforward: clean the surface thoroughly, let it dry, and apply the sealer.
How to Clean a Concrete Driveway Before Sealing
A dirty surface won’t bond well with sealer, so remove all dirt, grime, and stains before application.
Remove Surface Dirt and Debris
Sweep the entire driveway with a stiff broom to clear leaves, twigs, and dirt buildup.
Use a leaf blower for stubborn debris, and pay special attention to cracks and crevices where dirt hides.
Address Oil Stains and Grime
Oil stains are the toughest challenge and require targeted treatment before pressure washing. For details, see how to remove oil stains from a concrete driveway.
Use a concrete degreaser for heavy stains: apply it, let it sit for the label-recommended time, and scrub with a stiff brush.
Rinse thoroughly. Multiple applications may be needed for old, set-in stains, since oil prevents sealer from bonding properly.
Pressure Wash for Deep Cleaning
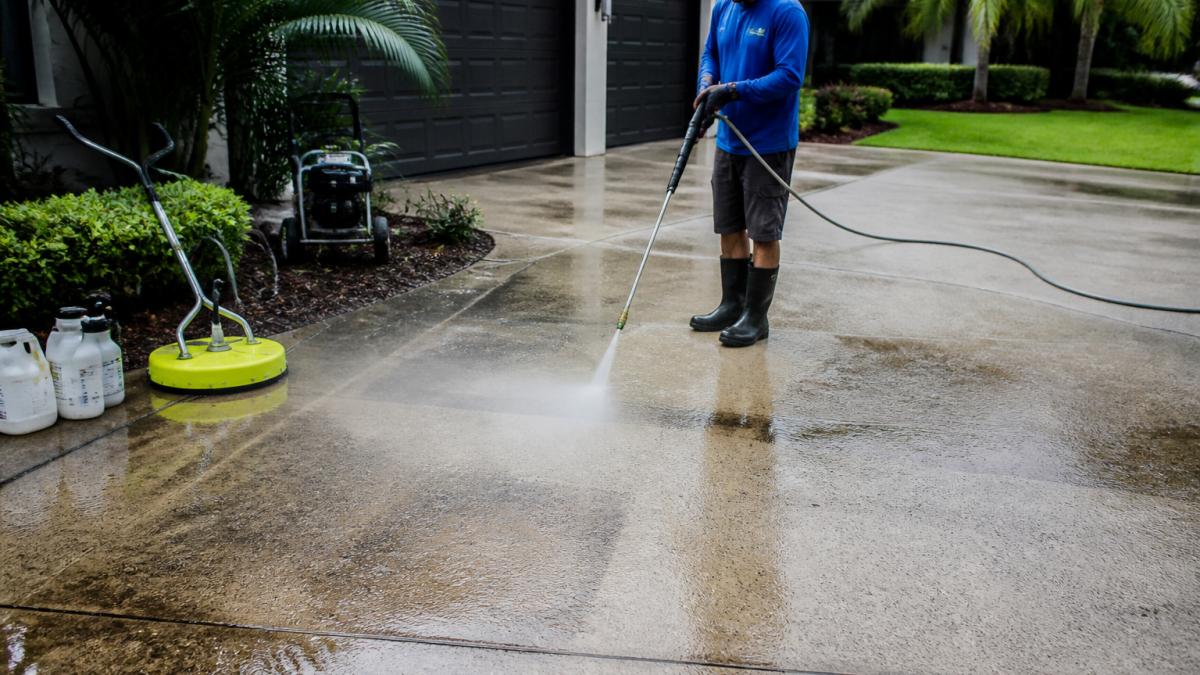
Pressure washing removes embedded grime.
For comparison between cleaning methods, pressure washing vs chemical cleaning for driveways explains the pros and cons of each approach.
Keep the nozzle moving and use overlapping passes in straight lines for even cleaning.
If you don’t have a pressure washer, how to clean a driveway without a pressure washer provides alternative methods that work well.
Let the driveway dry completely after pressure washing, at least 24 hours in dry conditions, since moisture prevents sealer adhesion.
Allow Your Concrete to Dry Completely
Wet concrete won’t accept sealer properly, and the coating may peel or fail prematurely. Here’s how to confirm your driveway is truly ready, not just surface-dry.
Perform a Moisture Test
Tape a 2-foot by 2-foot square of clear plastic sheeting to the concrete on all four sides and leave it for 24 hours. Condensation underneath, or darker concrete beneath, means moisture is still escaping, repeat every 24 hours until the plastic stays dry.
A second check is the mat test. Place a rubber mat or a piece of dark plastic on the surface for a few hours. If a dark, damp patch remains after you remove it, the concrete is still releasing moisture.
Check for Surface Dryness vs. Internal Moisture
Concrete can feel dry while still holding moisture deep in the slab. The plastic-sheeting test measures moisture vapor transmission, the real indicator of readiness. A handheld moisture meter gives a precise percentage; follow the manufacturer’s threshold.
Understand Temperature and Humidity Limits
Most sealers require surface temperatures between 50°F and 80°F during application and for 24 hours after.
High humidity slows evaporation and extends drying and curing times, so allow extra time between cleaning, sealing, and coats. Low humidity can cause the sealer to skin over too quickly, leading to bubbles or streaks.
Plan Around the Rain-Free Window
Sealer needs a rain-free window of at least 24 hours after application, and some products require 48. Check the forecast for the entire curing period, not just application day.
Do not apply sealer if rain is forecast within 24 hours. Water can wash away uncured sealer, cause whitening, and force a full strip and redo.
Adjust for Hot, Cold, and Humid Conditions
- Hot, sunny weather: Work in the morning when the surface is cooler. Avoid direct sun, which dries sealer too fast and leaves lap marks.
- Cool, cloudy weather: Drying and curing slow significantly. Allow extra time between coats and before traffic, and don’t apply if temperatures will drop below 50°F within 24 hours.
- Humid conditions: Extend drying time between cleaning, sealing, and coats, and use the plastic-sheeting test to confirm readiness.
Know When New Concrete Is Ready
New concrete must cure before sealing. Most manufacturers recommend waiting 28 to 30 days after the pour, since sealing too early traps moisture and causes blistering or peeling. Check the pour date with your contractor, or use the plastic-sheeting test: moisture under the plastic means it’s still curing.
Confirm Readiness Before You Start
Before you open the sealer, run through this checklist:
- Plastic-sheeting test shows no condensation after 24 hours.
- Surface temperature is within the manufacturer’s range (typically 50-80°F).
- No rain is forecast for at least 24-48 hours.
- Concrete is at least 28-30 days old (for new pours).
- Any old sealer has been tested for compatibility.
If you’d rather have a professional handle the readiness assessment and application, our sealing services include climate-adjusted scheduling.
Best Concrete Driveway Sealer Options
Choosing the right sealer matters, since different products work better for different situations.
| Sealer Type | Best For | Appearance | Durability | Typical Recoat Window |
|---|---|---|---|---|
| Water-Based Film-Forming | Budget-conscious DIYers, mild climates | Natural to slight sheen | 1-3 years | Every 1-2 years |
| Solvent-Based Film-Forming | Maximum protection, high-traffic driveways | Slight to glossy sheen | 3-5 years | Every 3-5 years |
| Penetrating Silicate/Siloxane | Stain prevention, freeze-thaw exposure | No surface change | 2-4 years | Every 2-4 years |
| Penetrating Silane | Deicing salt resistance, wet climates | No surface change | 3-5 years | Every 3-5 years |
| Acrylic Film-Forming | Decorative finishes, stamped concrete | Glossy or matte | 2-4 years | Every 2-3 years |
| Polyurethane Film-Forming | Heavy vehicle traffic, UV exposure | High gloss | 4-6 years | Every 4-6 years |
Water-Based Sealers
Water-based sealers are beginner-friendly, low-odor, and dry quickly, with simple water cleanup. They offer good stain resistance but shorter durability, typically one to three years, and weather affects them more than solvent-based options. They suit homeowners seeking an easy, low-hassle, more environmentally friendly option; look for low-VOC products if runoff or odor is a concern.
Solvent-Based Sealers
Solvent-based sealers provide stronger, longer-lasting protection, penetrating deeper and lasting three to five years. The tradeoff is odor and application difficulty: they require good ventilation, take longer to dry, and many are flammable, so keep ignition sources away and store rags in a sealed metal container. They work best for high-traffic driveways or harsh weather, with superior stain resistance and UV protection.
Penetrating vs. Film-Forming Sealers
Penetrating sealers absorb into the surface without changing appearance; silicates, siloxanes, and silanes are common, and silane-based products especially repel deicing salts and water. Film-forming sealers sit on top, creating a glossy or matte layer with stronger stain protection but more maintenance. Acrylics are budget-friendly and easy to apply; polyurethanes offer better UV and abrasion resistance but cost more.
Match the Sealer to Your Driveway Condition
Use this decision guide to narrow your options:
- New concrete (under 30 days old): Wait for full curing before sealing. Most manufacturers recommend 28 to 30 days. Choose a penetrating silane or siloxane sealer that won’t trap moisture.
- Previously sealed concrete: Identify the old coating first (see the section on sealing an old driveway). Solvent-based film-formers generally bond to water-based acrylics, but penetrating sealers may not adhere over a film-forming layer. Test a small area before committing.
- Freeze-thaw climate: Penetrating silane or siloxane sealers outperform film-formers because they don’t trap moisture that can freeze and spall the surface.
- Deicing salt exposure: Silane-based penetrating sealers are the top choice for resisting chloride intrusion.
- High-traffic vehicle driveway: A solvent-based polyurethane or acrylic film-former offers the best abrasion resistance.
Always test a small, inconspicuous area before applying any sealer across the entire driveway. This confirms adhesion and appearance before you commit to a full application.
Check Compatibility Before Recoating
If your driveway has been sealed before, the new product must be compatible with the old coating.
To test adhesion, apply a small patch in an inconspicuous area, let it cure 24 hours, and scratch it with a coin or fingernail.
For professional help matching a sealer to your driveway’s condition, our sealing services include a product recommendation.
Sealing an Old Concrete Driveway
Older driveways need extra attention. If the driveway has been sealed before, the old coating must be removed or the new sealer won’t adhere.
Crack depth matters too. According to crack repair guidance from All Day Power Washing, cracks deeper than 1/2 inch should be filled with a backer rod positioned about 1/4 to 1/2 inch below the surface before sealing.
Small cracks can be sealed over, but large ones need repair first; consult a concrete contractor for significant damage. Ensure the driveway is structurally sound before investing in sealer.
Apply Your Sealer in Even Coats
Proper application determines success. Uneven application leads to blotchy coverage and poor protection.
Choose Your Application Tools
Three main tools work for sealer application: sprayers, rollers, and brushes.
Sprayers cover large areas quickly and evenly, work best for solvent-based sealers, and require practice to avoid overspray.
Rollers provide good control and even coverage, work well with water-based sealers, and are beginner-friendly.
Brushes are precise for edges and detail work but slow for large areas.
For professional results, consider hiring experts.
Apply Thin, Overlapping Strokes
Thin coats work better than thick ones, which lead to buildup, peeling, and uneven appearance. Apply in overlapping strokes, each pass overlapping the previous by about 50%, working systematically from one end to the other.
Most driveways need only one coat; some products recommend two for maximum protection. Follow the manufacturer’s instructions.
How Long Does Concrete Sealer Take to Dry
Drying time depends on sealer type, temperature, and humidity. Most water-based sealers dry to the touch within two to four hours; solvent-based sealers typically require four to eight. Full curing usually takes 24 to 48 hours. Warm, dry conditions speed it up; cold, humid weather slows it significantly.
Common Mistakes to Avoid When Sealing
These mistakes are easy to make but simple to prevent.
Applying sealer to wet concrete traps moisture under the coating.
Using thick coats causes pooling, cracking, and peeling.
Skipping edge and crack treatment leaves vulnerable areas.
Not allowing proper drying time between coats causes adhesion problems.
Neglecting maintenance after sealing.
Frequently Asked Questions
Can you seal an old concrete driveway?
Yes, you can seal an old concrete driveway, but it requires thorough preparation. Old concrete may have existing coatings, moss, or algae that must be removed first. Check the concrete’s condition for deep cracks or spalling. If cracks are deeper than 1/2 inch, use a backer rod positioned 1/4 to 1/2 inch below the surface before sealing. Older driveways benefit from sealing to restore water resistance and protect against further wear.
How long does concrete sealer take to dry?
Drying time varies by sealer type. Water-based sealers typically dry in 1-4 hours, while solvent-based sealers may take 24-48 hours. Check the manufacturer’s instructions for your specific product. Curing time, when the sealer reaches full hardness, often takes 24-72 hours. Avoid foot traffic or vehicle use until fully cured. Temperature and humidity affect drying speed; cooler, humid conditions slow the process.
What should I use to apply concrete sealer?
You can apply concrete sealer with a roller, brush, or sprayer. Rollers work well for large, flat surfaces and provide even coverage. Brushes are ideal for edges and detailed areas. Sprayers offer speed but require more skill to avoid buildup. Many homeowners use a combination: a sprayer for the main surface and a brush for perimeter work. Ensure your tool is clean and appropriate for your sealer type.
How should I prepare my driveway before sealing?
Start by removing loose debris with a broom or blower. Pressure wash the entire surface to remove dirt, grime, oil stains, and algae. Let the concrete dry completely, typically 48-72 hours after pressure washing. For stubborn stains, apply a degreaser and scrub before washing. Repair any cracks larger than 1/4 inch with concrete filler. Check for and remove any existing coatings that are peeling or incompatible with your new sealer.