Last Updated: November 6, 2026
Quick Summary
Paver preparation means cleaning the driveway surface and filling the joints before any sealer goes on, so the seal can bond properly. Sweep, pull weeds, pre-wet, apply a mild cleaner, scrub, rinse, and let the surface dry completely. Most manufacturers suggest waiting at least 24 to 48 hours before sealing.
- Sealer bonds to the paver surface, so dirt, oil, and growth left underneath can cause peeling and cloudiness.
- Use a stiff nylon brush for stains; metal brushes can scratch the paver face.
- Keep pressure-washer spray angled across joints to avoid washing out joint sand.
- Test any cleaner on a small hidden area first, since some products can lighten or discolor pavers.
- Apply sealer when temperatures are roughly 50°F to 80°F and falling, with no rain forecast for 24 hours.
Table of Contents
- Why Clean Pavers Before You Seal Them
- Preparation Checklist Before Cleaning Your Driveway
- How to Clean Pavers Without Power Washing
- Choosing the Right Paver Cleaner for Each Stain
- Cleaning Patio Pavers Without Removing the Sand
- Drying Time, Weather, and When to Apply Paver Sealer
- Scheduling Your Driveway Cleaning and Sealing Next
- Frequently Asked Questions
Cleaning a paver driveway before you seal it is one of the most important steps a homeowner can take, and most of the mistakes happen before the sealer ever comes out of the bucket. Proper paver preparation is what separates a seal that lasts for years from one that fails within a season. This guide walks through the DIY cleaning process for paver preparation in plain terms. It covers how to prep pavers, which methods work, and how to know when you’re ready to seal.
Why Clean Pavers Before You Seal Them
Sealer bonds to the paver surface, so dirt, oil, and organic growth left underneath will trap in the seal and cause problems later. Cleaning first gives the sealer a clean surface to grip. Skipping this step is one of the most common reasons sealed pavers look cloudy, peel, or stain within a season. You can read about the other risks of skipping paver sealing before you decide how much prep to do.
Clean pavers also show you what you’re working with. Once the surface is clear, you can spot cracked pavers, loose joints, and stains that need a targeted treatment. A quick cleaning often reveals repairs that are cheaper to fix now than after sealing.
Preparation Checklist Before Cleaning Your Driveway
Gather everything before you start so you aren’t stopping midway through a wet surface.
- Stiff-bristle push broom or deck brush
- Garden hose with an adjustable spray nozzle
- Bucket with mild dish soap or a paver-safe cleaner
- Stiff nylon scrub brush for stains
- Old towels or cardboard for drips near the house
- Gloves and eye protection
- Plastic sheeting to protect plants and landscaping edges
Check the weather before you begin. You want at least two dry days ahead so the pavers can dry fully before sealing. Also check whether runoff will drain into a storm drain or a lawn. Soapy water and cleaner residue should not flow into storm drains, so direct runoff toward the grass and rinse thoroughly.
How to Clean Pavers Without Power Washing
Most DIY cleaning works well without a pressure washer, and a gentler approach is less likely to damage joint sand or the paver surface. If you do use a pressure washer, the settings matter as much as the soap. Here is a process you can follow, with pressure-washer details included.
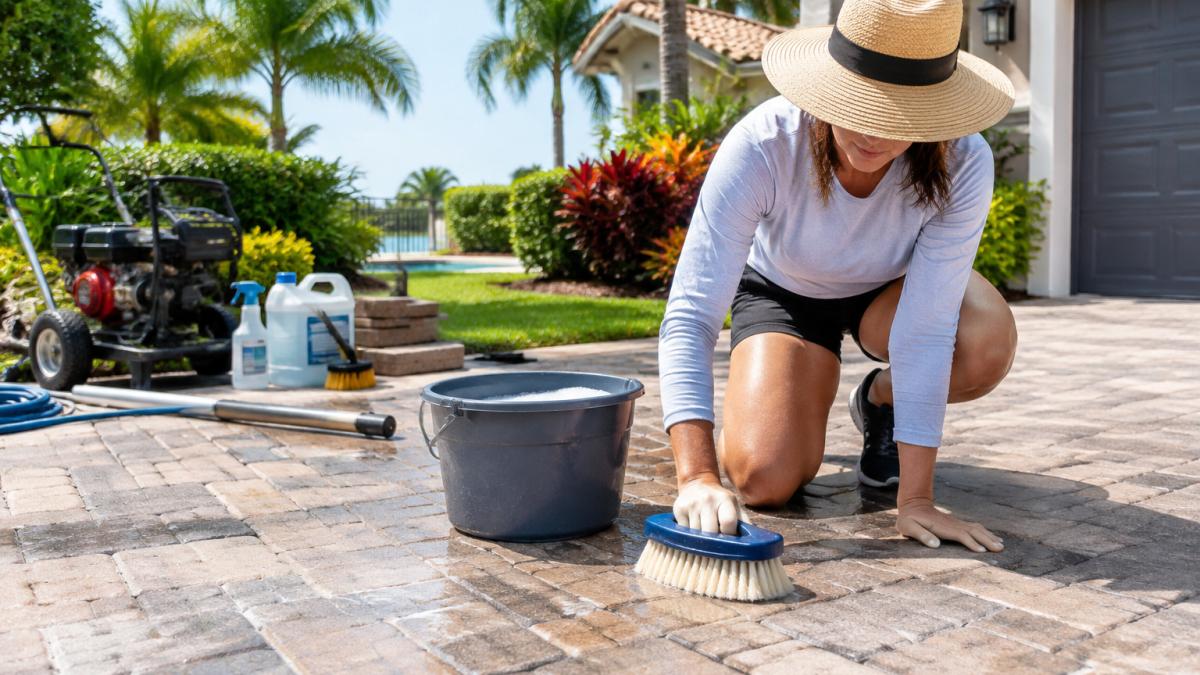
- Sweep the surface. Remove loose leaves, dirt, and debris with a stiff broom. Pay attention to the edges where grit collects.
- Pull weeds and growth. Remove weeds and moss from the joints by hand or with a joint tool. Roots left behind will regrow, so pull slowly and get the root.
- Pre-wet the pavers. Wet the surface with a hose. Wet pavers absorb cleaner more evenly and keep the cleaner from drying too fast.
- Apply the cleaner. Mix mild dish soap or a paver cleaner with water, following the label. Work in small sections so the cleaner does not dry on the surface.
- Scrub. Use the stiff nylon brush in a back-and-forth motion. Focus on stained spots and the joints where growth hides.
- Rinse thoroughly. Rinse each section before the cleaner dries. Leftover residue can interfere with sealing.
- Let it dry. Allow full drying before moving on.
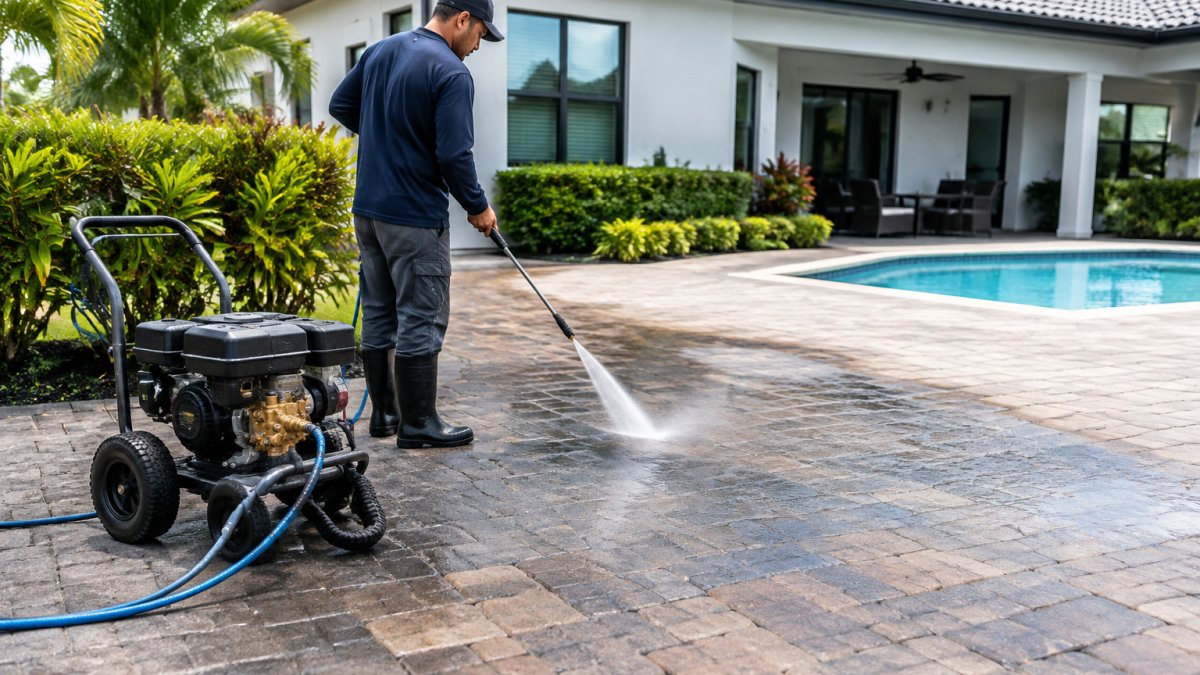
Pressure-washer settings and technique. Keep the nozzle moving and avoid holding it too close to the surface. Spray across the joints, not straight down into them, and reduce pressure if you see joint sand lifting. Test any attachment on a hidden area first. Pre-wet the surface and work in shade when possible.
Watch out: Scrubbing too hard with a metal brush can scratch the paver face. Stick with nylon bristles, and stop if the surface starts to scuff.
Choosing the Right Paver Cleaner for Each Stain
Different stains need different treatments. Matching the cleaner to the stain saves time and protects the surface.
| Stain Type | Suggested Approach | Best Used For |
|---|---|---|
| Routine dirt and dust | Mild dish soap and water | General cleaning |
| Organic stains (leaves, mulch) | Mild detergent with scrubbing | Tannin marks |
| Oil and grease | Degreaser made for masonry | Parking areas |
| Efflorescence (white haze) | Mild acid-free cleaner | Newer pavers |
| Rust | Rust remover made for pavers | Metal drips |
Always test a cleaner on a small hidden area first. Some concentrated products can lighten or discolor certain paver materials. If a stain won’t lift after two careful attempts, a professional cleaning is often the better path.
Cleaning Patio Pavers Without Removing the Sand
Patio pavers are set on a bed of sand and locked in place by the joint sand between them. Removing that joint sand to clean is rarely necessary, and it creates extra work. Instead, clean the surface and leave the joints alone where you can. Brushing and rinsing the surface will clear most dirt without disturbing the sand.
Be careful with high-pressure water near the joints. Aggressive spraying can wash out joint sand and loosen the paver base over time. If you see sand washing away during rinsing, reduce the pressure and angle the spray across the joints rather than into them.
Replacing Joint Sand After Cleaning
If joint sand is low or washed out after cleaning, top it up before sealing. Sweep fine joint sand into the gaps, then lightly mist the surface so the sand settles. Repeat until the joints are full and level with the paver edges. Polymeric sand, a binding product for joints, can help hold joints in place, but read the manufacturer’s instructions carefully, since application timing and drying requirements vary by product.
Drying Time, Weather, and When to Apply Paver Sealer
Sealing too early traps moisture inside the pavers, which can lead to cloudiness and peeling. Treat drying and weather as a checklist rather than a guess, and confirm the pavers and joints are ready before any sealer goes on.
Drying time. After cleaning, most manufacturers recommend waiting at least 24 to 48 hours before sealing, and longer in cool or humid conditions. Once the pavers are clean, this guide to maintaining driveway pavers after professional cleaning covers what to do next. Sun, humidity, and airflow all change the timeline. A common pattern is to allow an extra day in shaded areas or after rain. Do not rely on the surface alone: pavers that look dry on top can still hold moisture in the base.
Weather conditions. Apply sealer when the temperature is between roughly 50°F and 80°F and falling, not rising. If you live in a humid or sunny climate, paver sealing benefits for Florida homes explains how local weather affects the results. Avoid sealing in the heat of the day or when rain is forecast within 24 hours. Morning or late-afternoon application in mild weather gives the sealer the best chance to cure properly. Windy days can blow debris onto wet sealer, so cover or wait.
Readiness checklist before sealing.
- Surface is fully dry to the touch and passes the bare-hand test: if it feels cool or damp, wait longer.
- Joints are full and level; top up joint sand if it is low or washed out.
- No rain is forecast for at least 24 hours.
- Stains and organic growth are removed; remaining stains will be locked in by sealer.
- Loose or cracked pavers are repaired; sealing will not fix a unstable base.
- Plants and landscaping are protected from runoff and overspray.
If you are sealing as part of a larger exterior refresh, coordinate the timing with house wash and exterior home cleaning, driveway cleaning, pool deck cleaning, soft wash roof cleanings, and paver sealing so one job does not undo another. For example, roof cleaning runoff should be directed away from freshly cleaned pavers, and house wash overspray should not land on a surface that is drying for sealer.
Watch out: Sealing a surface that is still damp can trap moisture and cause a milky haze that is difficult to remove. When in doubt, wait another day.
Scheduling Your Driveway Cleaning and Sealing Next
Once your pavers are clean, dry, and joints are filled, you’re ready to seal. If you’d rather hand this off, Freedom Wash Club handles driveway cleaning and paver sealing for homes across South Florida. You can schedule by phone or text, and the company is licensed and insured. For those tackling a concrete driveway alongside pavers, our guide on sealing a concrete driveway yourself walks through that process step by step.
Planning ahead makes the whole job easier. Clean early enough to leave time for drying, and book your sealing for a window of dry, mild weather. Freedom Wash Club also offers a 100% satisfaction guarantee.
Frequently Asked Questions
How can I make my own homemade paver cleaner?
A common homemade option is a mild solution of dish soap and warm water, applied to a pre-wetted surface and scrubbed with a stiff-bristle brush. Test any mixture on a small, inconspicuous area first to confirm it does not discolor the pavers or loosen the joint sand. Rinse thoroughly with a garden hose so no soap residue is left behind, since residue can attract dirt and cause a film. For oil stains or stubborn grime, a commercial masonry-safe cleaner is often more effective, and product instructions should always be followed for dilution and dwell time.
How do you clean pavers without a pressure washer?
Start by sweeping away loose debris, dirt, and dust, then pull out weeds and moss from the joints by hand. Pre-wet the pavers with a garden hose, apply a suitable cleaner, and scrub with a stiff-bristle brush working in small sections. Rinse thoroughly, moving the hose from the top of the driveway down so runoff carries residue away. Allow the surface to dry completely before judging the results, since wet pavers can look darker than they will once dry.
How long should pavers dry before sealing?
Drying time depends on weather, humidity, and how deeply the pavers absorbed water. In warm, dry conditions a driveway may be ready within a day or two, but damp pavers or cooler weather can require longer. Check that the surface is fully dry and free of standing water, and confirm the timing against your paver sealer’s product instructions. Sealing too soon can trap moisture and cause hazing, so it is worth waiting when conditions are uncertain.
Can you use vinegar to clean pavers?
Vinegar can help with light mineral staining and efflorescence on some paver types, but it is acidic and can etch or dull certain materials, including some natural stone and concrete finishes. It can also weaken joint sand over time. Test it on a small area first, dilute it, and rinse thoroughly afterward. For routine cleaning or oil stains, a mild detergent or a product made for pavers is usually a safer choice.
Need help getting your pavers ready? Schedule your cleaning with Freedom Wash Club and request your free quote today.