
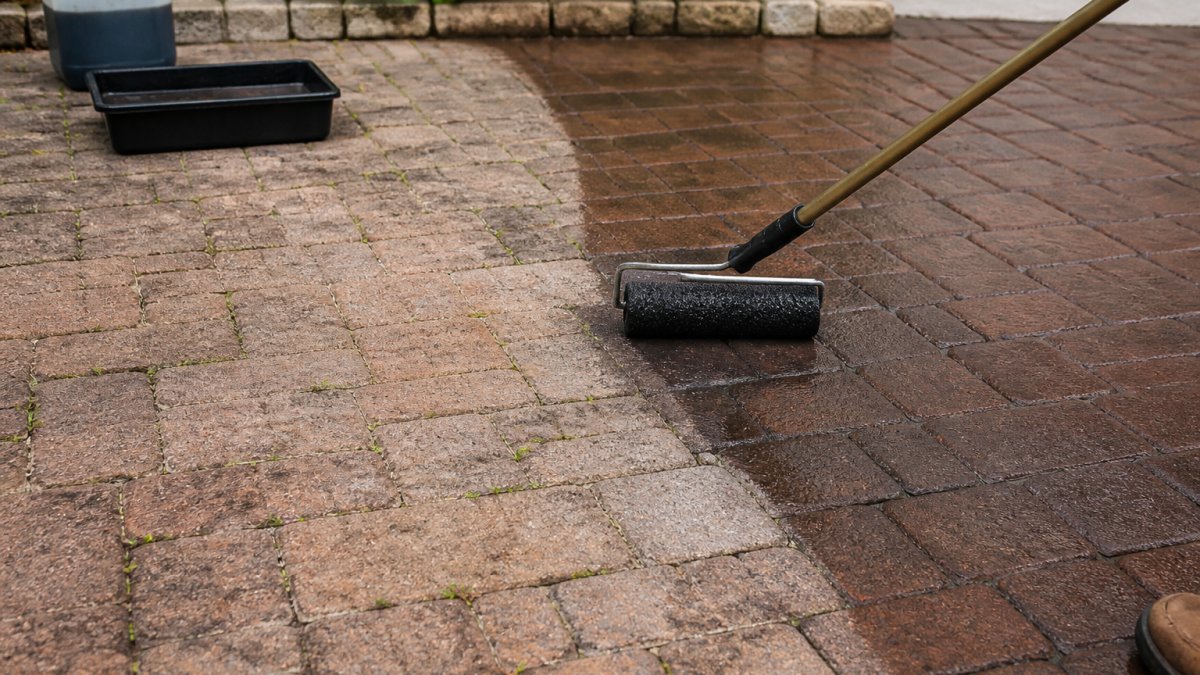
Table of Contents
- How Paver Sealing Affects Weed Growth
- Does Polymeric Sand Stop Weeds Between Pavers
- How to Remove Weeds from Paver Joints Before Sealing
- How to Prevent Weeds Between Pavers Long-Term
- How Often to Seal Pavers for Best Results
- What Happens When Weeds Return After Sealing
- Frequently Asked Questions
Last Updated: October 17, 2026
How Paver Sealing Affects Weed Growth
Does paver sealing prevent weed growth? The short answer is: it helps, but it’s not a complete solution on its own. Paver sealing reduces weed growth by creating a barrier that makes it harder for seeds to take root in the joints between pavers. However, weeds can still emerge if the underlying conditions aren’t addressed first.
At Freedom Wash Club, we’ve worked with hundreds of South Florida homeowners dealing with weeds between pavers. What we’ve learned is that sealing works best when combined with proper joint preparation and the right joint material. Sealing alone won’t stop determined weeds, especially if soil and debris are packed into the joints before you apply it.
The real issue is that weeds need three things to grow: seeds, moisture, and soil. Paver sealing addresses moisture to some degree, but it doesn’t eliminate seeds or soil buildup. That’s why the preparation steps matter just as much as the sealer itself.
Think of sealing like putting a lock on your front door. It makes entry harder, but it’s not foolproof. You need to clear the path first and make sure the door frame is solid.
The best time to seal pavers is after you’ve removed existing weeds and cleaned the joints thoroughly. Sealing dirty joints traps debris and actually makes future weed removal harder.
Does Polymeric Sand Stop Weeds Between Pavers
Polymeric sand is specifically designed to prevent weeds between pavers, and it is far more effective than regular sand at blocking weed growth. When polymeric sand gets wet, it hardens and locks together, creating a barrier that is extremely difficult for seeds to penetrate. Regular sand, by contrast, stays loose and allows seeds to settle deep into the joints.
How to prevent weeds between pavers starts with the right joint material. Polymeric sand works because it fills the gaps completely and then solidifies. This means seeds cannot reach soil where they would sprout. It also reduces water infiltration, which cuts off one of the three things weeds need to grow.
The catch is that polymeric sand requires proper installation. If you do not compact the base layer correctly or if you do not seal it properly after application, it will not perform as intended. Many homeowners apply polymeric sand but skip the sealing step, which means the sand never fully hardens and weeds still find their way through.
| Joint Material | Weed Prevention | Durability | Cost Factor |
|---|---|---|---|
| Regular sand | Poor | Low (shifts easily) | Lowest |
| Polymeric sand | Excellent | High (hardens permanently) | Moderate |
| Polymeric sand + sealer | Excellent | Excellent (sealed barrier) | Higher |
Freedom Wash Club recommends polymeric sand for any paver project where weed prevention is a priority. It is the foundation that makes everything else work. Without it, even the best sealer will not keep weeds out long-term.
Paver and Joint-Material Compatibility
Not all pavers and joint materials work the same way. Concrete pavers, clay bricks, natural stone, and permeable pavers each have different porosity, joint widths, and movement characteristics. Polymeric sand is generally compatible with concrete and clay pavers with joint widths between 1/8 inch and 1 1/2 inches, but natural stone with irregular edges may require a different joint-stabilizing product. Always check the polymeric sand manufacturer’s compatibility chart before applying. For sand-filled joints, you must remove the old sand to a depth of at least 1 inch before adding polymeric sand, or the new material will not lock properly. If your pavers have very narrow joints (under 1/8 inch), a fine-grade polymeric sand or a stabilized joint sand may be required.
Step-by-Step Polymeric Sand Application and Curing
Proper installation is what separates a weed-blocking joint from a failed one. Follow this sequence:
- Clean the joints to a depth of at least 1 inch using a screwdriver, joint cleaning tool, or a low-pressure washer. Remove all old sand, soil, and organic debris.
- Ensure the pavers are completely dry before applying polymeric sand. Moisture in the joints prevents proper bonding.
- Sweep the polymeric sand into the joints, filling them completely and slightly overfilling. Use a broom or a joint sand applicator.
- Compact the sand into the joints using a hand tamper or a plate compactor with a rubber pad. This step is critical, it forces the sand particles together and eliminates voids.
- Sweep off all excess sand from the paver surface. Any sand left on the surface will haze when wet.
- Mist the pavers lightly with water to activate the polymeric sand. Use a fine spray and avoid pooling or runoff. The sand should darken as it absorbs water.
- Allow the sand to cure for at least 24 hours before allowing foot traffic, and 48-72 hours before vehicle traffic or sealing. Curing time varies by product and humidity, check the label.
If you seal the pavers after the polymeric sand has cured, the sealer locks the sand in place and adds a water-resistant layer on top. This double barrier is what makes long-term prevention possible. But sealing before the sand has fully cured traps moisture and prevents hardening.
If you apply polymeric sand but do not seal it afterward, you are only getting half the benefit. The sand needs to harden completely to block weed seeds effectively.
Why Polymeric Sand Alone Sometimes Fails
Even correctly installed polymeric sand can fail if the base is unstable, if water pools in the joints, or if the sand is applied too thin. In those cases, weeds can exploit cracks and gaps. That is why sealing and ongoing maintenance matter, polymeric sand is the primary defense, but it is not a permanent, maintenance-free solution.
How to Remove Weeds from Paver Joints Before Sealing
Removing existing weeds before sealing is non-negotiable. If you seal over weeds or their roots, you’re trapping them in place and making future removal much harder. The process takes time, but it’s essential for long-term weed prevention.
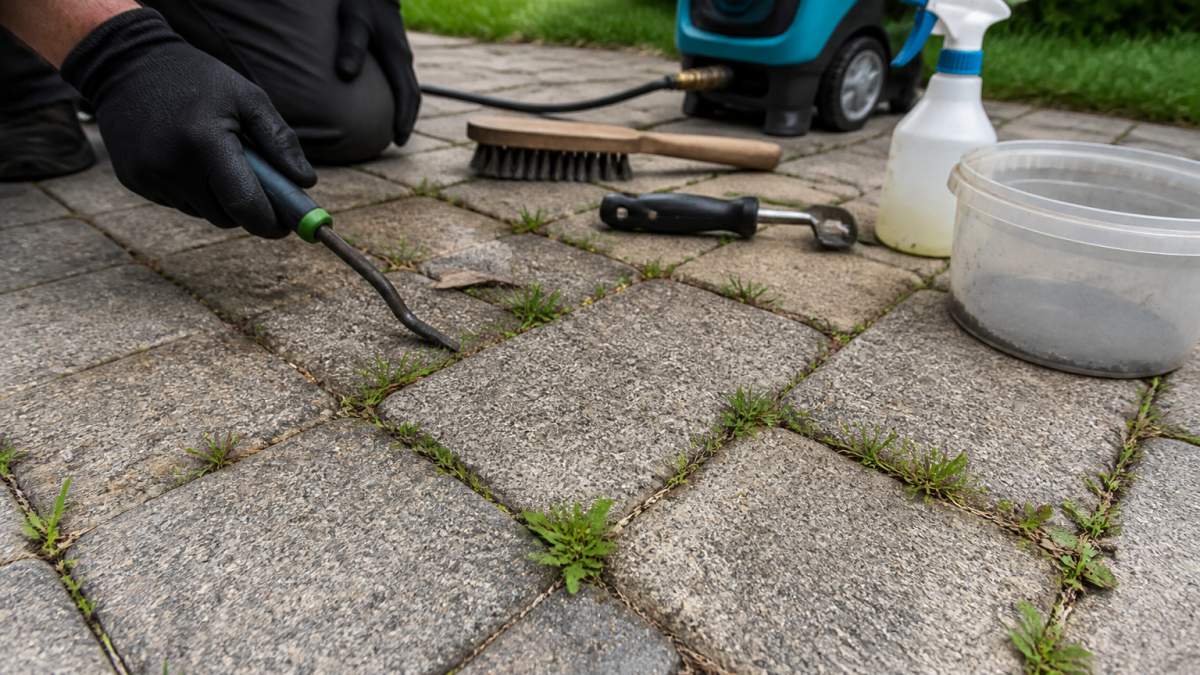
Start by pulling out visible weeds by hand. Get as much of the root system out as you can. For stubborn weeds with deep roots, use a thin scraper or old flathead screwdriver to dig into the joint and pry the roots out.
Next, clean out all the debris from the joints. Use a pressure washer on low to medium pressure, or a stiff brush and water. The goal is to remove dirt, sand, leaves, and any remaining plant material.
For joints that are heavily packed with soil, you may need to use a joint cleaning tool or even a small wire brush attachment on a power drill.
Many homeowners skip this step and regret it. Sealing dirty joints means sealing in the very conditions that promote weed growth. Take the time to do it right.
Clean joints are the foundation of effective weed prevention. Rushing this step undermines everything that comes after.
How to Prevent Weeds Between Pavers Long-Term
Long-term weed prevention requires a three-part approach: clean joints, polymeric sand, and paver sealing. Each part handles a different part of the problem.
Start with polymeric sand in the joints. This is your primary defense. It creates a physical barrier that stops seeds from reaching soil. Apply it according to the manufacturer’s instructions, making sure to compact it fully into the joints.
After the polymeric sand is in place and has cured, apply a quality paver sealer. The sealer locks the sand in place and adds a water-resistant layer on top of the pavers themselves. This double barrier is what makes long-term prevention possible.
Finally, maintain your pavers by sweeping them regularly and removing any debris that accumulates. Leaves and dirt can trap moisture and create conditions where weeds might still sprout. Regular cleaning keeps the surface inhospitable to weed growth.
The maintenance schedule matters too. Most sealed pavers stay protected for several years, but the protection gradually weakens over time. That’s why resealing every few years is part of a long-term prevention strategy.
At Freedom Wash Club, we recommend thinking of paver maintenance like roof maintenance. One good cleaning and seal job isn’t enough. You need to plan for ongoing care to keep your investment protected.
How Often to Seal Pavers for Best Results
How often to seal pavers depends on climate, foot traffic, and sun exposure. In South Florida’s humid environment with intense sun and regular rain, most sealed pavers benefit from resealing every 2-3 years. This timeline keeps the protective barrier strong and weed prevention effective.
The first sign that your sealer is wearing is when water stops beading on the surface. Instead of forming droplets, water spreads out and soaks in. This means the sealer has broken down and is no longer providing protection. That’s your signal to reseal.
High-traffic areas like driveways and pool decks may need resealing more frequently, sometimes every 18-24 months. Shaded areas that stay damp longer might need it less frequently, but they’re also more prone to weed growth and algae, so don’t skip them.
Before resealing, clean the pavers thoroughly. Dirt and algae buildup prevent the sealer from bonding properly. Freedom Wash Club handles both the cleaning and sealing in one service, which saves time and ensures the sealer goes on clean pavers.
Mark your calendar when you seal your pavers. Set a reminder for 2-3 years out to check the surface. This simple habit keeps your weed prevention system working year after year.
What Happens When Weeds Return After Sealing
Even with proper sealing and polymeric sand, weeds sometimes return. This usually means one of three things happened: the sealer broke down, seeds found a tiny gap, or the underlying soil conditions are still favorable.
The most common reason weeds return is that the sealer has worn thin or cracked. UV exposure, heavy foot traffic, and freeze-thaw cycles all break down sealer over time.
Sometimes weeds return because the initial weed removal wasn’t complete. If roots were left behind or seeds were buried deep in the soil before sealing, they can still germinate. This is rare if you followed the cleaning process properly, but it happens.
The third scenario is that new seeds are blowing in from nearby plants or spreading through the yard. Paver sealing can’t stop seeds that land after the sealer is applied. You can only prevent seeds from reaching soil that’s already there.
When weeds do return, the fix is straightforward: remove them, clean the joints again, and reseal if necessary.
Don’t assume sealing failed if a weed appears. Weeds are persistent, and perfect prevention isn’t realistic. What matters is that the system makes weed growth much harder and slower than it would be without protection.
Keeping your pavers weed-free requires more than just sealing, it takes the right preparation, materials, and ongoing maintenance. Freedom Wash Club specializes in the complete process: we remove existing weeds, clean your joints thoroughly, apply polymeric sand, and seal everything properly. We work around your schedule with easy phone or text booking and stand behind our work with a 100% satisfaction guarantee. Learn more about professional paver maintenance from industry standards and best practices for exterior property care.
Frequently Asked Questions
Does sealing pavers stop weeds from growing between them?
Paver sealing significantly reduces weed growth by blocking water infiltration and creating a barrier that makes it harder for seeds to take root in joint material. However, sealing alone doesn’t eliminate weeds entirely. Windblown seeds can still land on sealed surfaces, and weeds may eventually grow if the sealer breaks down or if joints aren’t properly maintained. Combining sealing with polymeric sand and regular maintenance provides the best weed prevention.
Should you remove weeds before sealing pavers?
Yes, removing existing weeds before sealing is essential. Sealing over weeds traps them in place and can cause them to spread beneath the surface. Clean paver joints thoroughly, pull out all visible weeds, and allow the joints to dry completely before applying sealer. This ensures the sealer bonds properly and gives you the best chance of preventing new weed growth in the future.
How often should pavers be resealed to prevent weeds?
Most paver sealers last several years depending on weather exposure, foot traffic, and UV intensity. Regular inspection of your patio, driveway, or pool deck helps you determine when the sealer is breaking down and weeds are returning more frequently.
Can paver sealer damage nearby plants or grass?
Most modern paver sealers are designed to be environmentally safe when applied correctly, but it’s wise to protect surrounding plants and grass during application. Avoid overspray on adjacent landscaping, and allow the sealer to cure fully before allowing pets or heavy water exposure near the edges. If you’re concerned about environmental impact, discuss sealer options with a professional before application.